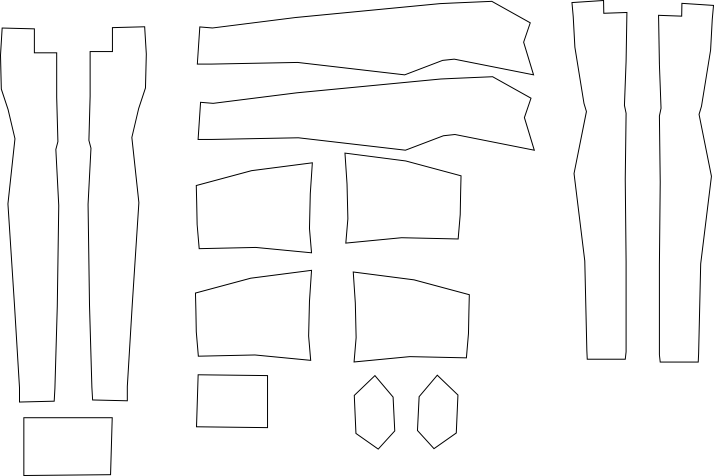
This describes the clothing editor (ClothEd), a program for
converting clothing patterns into three-dimensional meshes.
The clothing editor (ClothEd) is a program for converting
clothing patterns into three-dimensional meshes that can be input
into a 3D modelling package such as Blender. It is about 6000 lines
of Perl and it is basically a prototype: the core functionality is
barely working and it needs improvement everywhere (code quality,
functionality, stability). This README.html and the TODO.html file
in the distribution are the only documentation.
INSTALLATION
Prerequisites
- Perl modules:
- Carp
- Data::Dumper
- DBD::SQLite
- DBIx::Class (bundle)
- Getopt::Long
- Wx (bundle)
- XML::Twig
- and any dependencies they might have
- Perl
- Inkscape
- Blender 2.5 or later
- WxGlade (only for development)
The code simply needs to be copied into an appropriate directory.
USAGE
Overall
- Create clothing pattern as SVG file using Inkscape
- Import pattern into the Clothing Editor, fix up, and create
mesh
- Import mesh into Blender and clean up
Create clothing pattern

- Draw the clothing pattern as closed paths using a Scaled Vector
Graphics (SVG) editor such as Inkscape.
- Only use straight lines. Using arcs, Bezier curves, or freehand
will cause the Clothing editor to crash.
- Label each piece (in Inkscape, use Object/Object
Properties).
Run clothing editor

Create database and load it
- Create a new 'database' by running ./mkgarment.sh name
- Open the editor using ./clothed.pl. Given the current state of
the program, it is best to run it from a terminal so you can see
the error messages when it crashes.
- Command line options to clothed are:
- db - specify thye database file
- in - specify the input (SVG) file name
- out - specify the output mesh file
These are all optional as the files can be selected using the file
pickers.
- Select the name of your 'database' using the file picker
control.
- Select the name of your SVG file and Load the pattern. (Note:
the SVG can be reloaded again later if you have modified it.
Usually you do not want to 'discard everything'. If the reload
crashes the clothing editor because you have deleted some pieces or
some points, run sqlite3 path/to/yourdatabase.db <tidy.sql and
then try again).
Position pieces in 3D world space
- Using the list boxes, select the pieces of the pattern that you
want to work on. Note that you can select two pieces, one on the
left and one in the centre.
- On the right hand side, zoom the 3D view to larger and use the
rotate and pan controls to see all the pieces of the pattern.
Initially they will all be superimposed. These controls only affect
the viewport and do not move the pattern around.
- Select the correct orientation for each piece by selecting it
in the left hand panel and selecting the correct orientation. For
example you might choose:
- for a front piece, U -> +X and V -> +Y
- for a side piece, U -> +Z and V -> +Y
- for a top piece, U -> +X and V -> +Z
- Look at the 3D view to see that the pieces have the correct
alignments.
- Use the location sliders on the left to move the pieces into
their approximate position in the 3D view. Rotate the 3D view as
required to determine the correct relative positions. If you need
to move a piece carefully relative to another, select the other
piece in the centre panel and select 'show selecvted'; then only
the two pieces will be displayed. If you select 'Show connected' it
will show all pieces connected to the left hand piece.
Join pieces together and subdivide pieces
- Select a point in the left or centre panels by clicking on it;
it should be hightlighted in red.
- 'Join' another point by control-clicking on it. It should
become yellow. This will result in both points becoming one point
in the eventual output mesh. There will also be a grey line
connecting the two points in the 3D view.
- Extra points can be selected by shift-clicking on them. They
will become pink.
- If two points are selected (ie one red and one pink), you can
click on Connect and the piece will be divided into two. The number
of intermediate points can be controlled by the edit box.
- If four pieces are selected, you can click on Rectangle and the
mesh will be divided into rectangles. The number of rectangles can
be controlled by the edit box.
Write out mesh
- Finally, choose your mesh output file and click on Write. This
will calculate for several minutes or longer, depending on the
number of iterations selected. Unless a piece is marked 'stiff', it
will be divided into quads or triangles before output. If a piece
is marked 'hide', it will impact the 3D conversion process but not
be output into the mesh.
Import into Blender
- Open Blender, go to text editor, open add_clothes.py and run
it. (Once only: this registers the operator. As Blender 2.5 is
still under development, add_clothes.py might not compile in your
version of Blender).
- Go to the 3D editor, select Add|Clothes from the menu and
select the mesh file that you created in the Clothing Editor. This
should import the mesh.

- Things you could do in Blender to tidy the mesh and make it fit
a humanoid model:
- go into edit mode (select all) and calculate normals
outward.
- grab (move), scale and rotate the mesh to make it match your
model.
- create a simple armature (a dozen bones or so), parent it to
the clothes mesh, apply heat to create vertex groups, move the
armature until the clothing mesh matches your model in rest
position, then apply the modifier (so that the clothes now match
the model).
- use the sculpt tool and other tools to move the clothes mesh
into position (hopefully, you will not need to do this).
- use 'retopo' to fix the mesh structure.
- usual clothing things such as applying a cloth modifier and
parenting the clothes mesh to an armature.
 Mesh as cleaned up using Blender (model from MakeHuman).
Show dump utility
If the main clothing editor is run with the tracing option on,
it will produce a file dump.txt. which can be read by the
showdump.pl utitlty. This is not required for normal operation but
can give some insight into what the clothing editor is doing.
The dump output consists logically as a sequence of frames. The
leftmost spin button can be used to page through these frames.
If the show checkbox is turned on, one of the regions in the
display is filled in. By paging through the second spin button, it
is possible to show each region in turn.
About the project
Project detail and discuss
Get support
About SourceForge.net:
SourceForge.net
is the world's largest provider of hosting for Open Source software development projects. SourceForge.net provides a variety of services to projects, including a download mirror network, collaborative development tools (like CVS and Subversion), and tools to support discussion and support. These services are provided to projects and their end-users free-of-charge.
About Open Source:
Of benefit to users,
Open Source
software is licensed so you can download and use the software free-of-charge. The source code for this software is made available free-of-charge, you (or a programmer you hire) can make changes to this software to better meet your needs, and you can release your changed code back to the community passing the benefit on to other users.
The exact license terms used by this project on their
project summary page
and in the licensing documents included in their
downloads.

 Mesh as cleaned up using Blender (model from MakeHuman).

